

My video is called 'Chloe' and is 40 seconds long. In this video a teacher begins to vent to another teacher about her 'day from hell'. She is then seen bitching about one of her students, unaware that she is actually still in the room.
1) Who did you work with and how did you manage the task between you?

In my group I worked with Ella, Alex and Pheobe (pictured left to right). We managed this task by working together as a group to come up with ideas for the shoot. As a group, we decide the story that we wanted to tell and how we would convey this by carefully planning our shots. However, we also had individual responsibilities within the group. Ella was camera and creative director and was in charge of shaping the storyline of the video. Alex acted in the video and was also in charged of planning the room and organising any furniture/props within it. Pheobe also acted in the video and was in charge of drawing out our storyboard. I contributed by playing the main teacher in the video and was also in charged of writing the script. We were all involved int the editing process, and I was partnered with Ella for this activity.
2) How did you plan your sequence? What processes did you use? What theories did you try to take into account?
We planned our sequence by creating a storyboard of all the shots that we wanted and then began scripting it. We then drew a top down plan of our shoot room to check that the shots created would work in the space available. We also checked that our shots would work by walking through the shots around the space as a 'practice shoot' with members of the team checking whether the set up of the shots were successful. Once any amendments had been made, We then casted the characters within our video. After this, we created a props list for our shoot. Considering the time frame we had and the space that was available to us, we then created a shoot schedule so that our day was clearly planned out, preventing delays on the actual day.
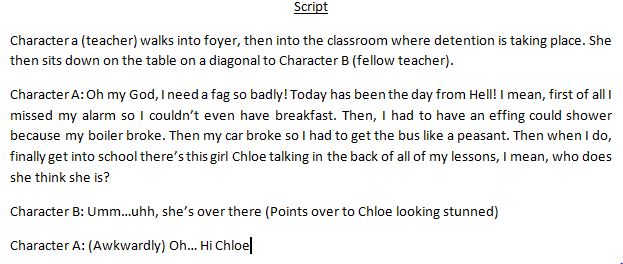 |
| Our script |
 |
| Our top down plan |
 |
| Our shoot schedule |
 |
| Our storyboard |
In our video we took the theories of continuity, framing, genre signifiers and representation into account. We attempted to create continuity through techniques such as not breaking the 180 degree rule, preventing an 'jumps' in the final edit of our video. We also included a master shot which increased continuity as it introduced the two main characters in the same geographical space. By using other techniques such as the shot/reverse/shot and eyeline matches, we are able to show the video from the perspective of one of the characters. This enhances the narrative elements of the video and makes it flow better, therefore improving the continuous elements of it. We also shot and edited the video as a 'real time sequence' so the events were more realistic and looked more continuous. We used a variety of shot types to get different framing types and make the video more interesting visually. We suggested our genre through our choice of characters. We decided to use a very 'over the top' character and a very shy and nerdy character as the main focus of the video. This contrast in characteristics left a lot of room for comedic potential. We were able to represent a lot of people through our choice of casting. By having very ethnically diverse characters we were able to create a large ethnic representation.
3) What technology did you use to complete the
task, and how did you use it?
Technology used
on the shoot:
- Canon HF G30 camera
- Tripod
- Headphones
- A shotgun microphone
How it was used:
We kept our camera on auto settings for ease of use in our shorts time available,We attached our camera to the tripod to prevent our shots from being
shaky. We ensured that our shots were level by making sure that the spirit
level on the tripod was well balanced. We created different shot types by using
the zoom functions on the camera. We were able to use the tripod handle to
create pans in our video. We also attached our shotgun microphone to the
camera. We used this microphone in order to minimise background noise such as
wind, whilst also ensuring that it would pick up all the dialogue in the area
surrounding it. We also ensured that the quality of our sound was good by
plugging headphones into the camera. This meant that we were able to listen to
what the microphone was recording and were able to direct people to speak up if
the microphone was not picking up their voice. It also meant that any unwanted
sound was picked up and resulted in us stopping filming until the sound had
stopped. We also used a clapper board at the beginning of each shot so that it
would be easier to identify the shots at a later stage. A safety precaution we
had to take was ensuring that the wire of the headphones were in sight as they
created a trip hazard.
 |
| A picture of me shooting |
Technology used to edit:
- Dual monitor editing station
- Adobe Premiere Pro CS5
How it was used:
The first decisions that Ella, my partner, and I had to make was which take of the shots taken that we wanted to use. Once we had reviewed them all and picked the once we wanted we then began to edit them. We altered the lengths of our shots by using the in and out functions on the software. We then dragged the cut down clips on to timeline for more close cut editing. As our monitor stations had 2 screens, we were able to look at the shots that we were inputting on the left screen, whilst having a preview of all the edited shots one the right. This was useful as we were able to watch the footage that we had created and find errors which we would then fix on the left monitor.
4) What factors did you have to take into account when planning, shooting and editing?
Planning
We knew that we had a very strict amount of time and space to shoot in. This affected the shots that we chose to include as they have to fit within these limitations. We also had to think about how we would set up the camera around the room without breaking the 180 degree rule which also affected the composition of our shots. We also had to spread out the work load across the team members which was difficult considering we had such a small group. This small number of people also affected who was available to act within our video.
Shooting
During the shoot we had to take the constraints of space and time into account again. As we were sharing some of our shooting space with another group, we also had to take their shooting time into account. Objects such as furniture and walls also had to be taken into account as they affected how we set up our camera and therefore affected the overall composition of the shot. As we were filming in a busy building we also had to take factors such as background noise e.g the school bell into account.
Editing
When editing we had to many different continuity editing techniques into account. Techniques such as shot/reverse/shot affected our choice of shots and the way that they were edited as it requires different shots from different angles to be edited continuously in a sequence. Match on action shots are another feature of continuity that we incorporated. If affected the lengths of our shots as we attempted to get them to match perfectly.
5) How successful was your sequence? Please identify what worked well, and with hindsight, what would you improve/do differently?
I think that my sequence was very successful as it met the requirements of the brief. An example of something that I think went well is the match on action shot that Ella and I achieved from shot 1 and 2. We were able to successfully match the action of the door being opened in these two shots, thus increasing the continuity of the sequence. I also think that we created a good sense of narrative within this sequence. We were able to do this through using techniques such as shot/reverse/shot and eyeline match to show the conversation from different perspectives. We also successfully stuck to the 180 degree rule and included a master. These are both techniques that helped enhance the continuity of our sequence and make it more successful. However there are some slight continuity errors in our sequence. For example, In the 4th shot my character is holding a book but in the next shot she is not. This goes against the theory of continuity and disrupts the sequence's flow. Another error can be seen between the penultimate and ultimate shot (shot 9 and 10). In shot 9 (Chloe's reaction shot) she turns her head to the left. However, in the final shot she is seen face the right. This also disrupts the continuity in this section of the sequence and results in it not flowing as smoothly. In hindsight I would have used better planning and shooting techniques to avoid these errors. By keeping an eye on the iconography of the shot I could prevent missing props. Doing this in combination of ensuring that the positioning of people within the shots stayed exactly the same as the previous shot would create a more successful sequence.
6) What have you learnt from completing this task? Looking ahead, how will this learning be significant when completing the rest of your foundation coursework, do you think?
The top 3 things I've learnt from doing this project are...
 |
| A picture of me editing with my partner |
4) What factors did you have to take into account when planning, shooting and editing?
Planning
We knew that we had a very strict amount of time and space to shoot in. This affected the shots that we chose to include as they have to fit within these limitations. We also had to think about how we would set up the camera around the room without breaking the 180 degree rule which also affected the composition of our shots. We also had to spread out the work load across the team members which was difficult considering we had such a small group. This small number of people also affected who was available to act within our video.
Shooting
 |
| The classroom we filmed in |
Editing
When editing we had to many different continuity editing techniques into account. Techniques such as shot/reverse/shot affected our choice of shots and the way that they were edited as it requires different shots from different angles to be edited continuously in a sequence. Match on action shots are another feature of continuity that we incorporated. If affected the lengths of our shots as we attempted to get them to match perfectly.
5) How successful was your sequence? Please identify what worked well, and with hindsight, what would you improve/do differently?
I think that my sequence was very successful as it met the requirements of the brief. An example of something that I think went well is the match on action shot that Ella and I achieved from shot 1 and 2. We were able to successfully match the action of the door being opened in these two shots, thus increasing the continuity of the sequence. I also think that we created a good sense of narrative within this sequence. We were able to do this through using techniques such as shot/reverse/shot and eyeline match to show the conversation from different perspectives. We also successfully stuck to the 180 degree rule and included a master. These are both techniques that helped enhance the continuity of our sequence and make it more successful. However there are some slight continuity errors in our sequence. For example, In the 4th shot my character is holding a book but in the next shot she is not. This goes against the theory of continuity and disrupts the sequence's flow. Another error can be seen between the penultimate and ultimate shot (shot 9 and 10). In shot 9 (Chloe's reaction shot) she turns her head to the left. However, in the final shot she is seen face the right. This also disrupts the continuity in this section of the sequence and results in it not flowing as smoothly. In hindsight I would have used better planning and shooting techniques to avoid these errors. By keeping an eye on the iconography of the shot I could prevent missing props. Doing this in combination of ensuring that the positioning of people within the shots stayed exactly the same as the previous shot would create a more successful sequence.
6) What have you learnt from completing this task? Looking ahead, how will this learning be significant when completing the rest of your foundation coursework, do you think?
The top 3 things I've learnt from doing this project are...
- The importance of checking that the shots being used work by walking them through. This helped a lot on the shoot as we knew that the shots the we wanted were possible. It also helped to save time as everyone was aware of how the shots should be set up.
- The importance of shooting more takes than required of a shot. This means that there is a wider variety of shots available to pick from when editing. Even the slightest differences between shots can improve the overall continuity of a sequence.
- The importance of including the same iconography between continuous shots. By keeping actors and props the same the sequence is able to flow more smoothly.
All of the lessons that I have learnt will help me in my future projects. I will now be able to apply the good points of this project to my future project and use my experiences to prevent the downfalls of this project happening in the future.
No comments:
Post a Comment