My name is Olamide Ajisafe. My candidate number is 8010. I am in a group 3 with Jerom Thambipilliai (8692) and Matthew Davies (8511). To see my work, please click on the 3 labels on the right named A2 Research and Planning, A2 Construction, and A2 Evaluation.
Below is our finished music video...
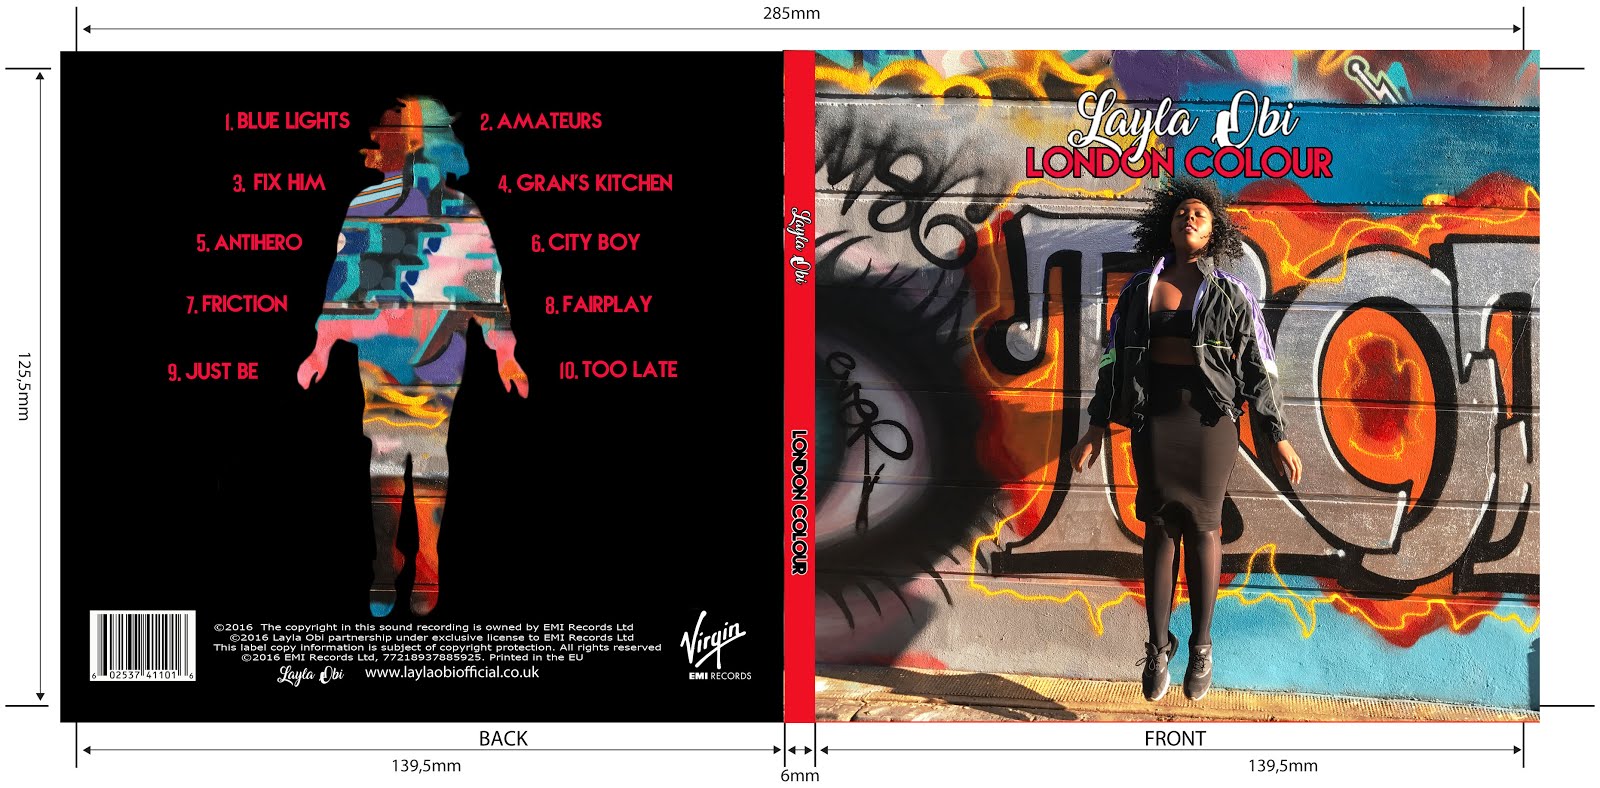
Below are the external panels of our Digipak. Left is the back and right is the cover
Below are the external panels of my Digipak
Left is the back of the album and to the right is the front
Below are the internal panels of our Digipak
Below are the internal panels of our Digipak
Below are the internal panels of our Digipak
Click on the image below to be directed to our website
Wednesday, 22 June 2016
Evaluation Q2: What have you learnt from participating in each of the prelim tasks 1,2,3 and 5?
Prelim Task 1
This task of creating an audition video was very useful as it helped me become more familiar with the camera. Through this process I was able to become more aware of which parts of the camera I was looking at and attempted to avoid looking at the view finder of the camera rather than the lens of the camera. This meant that I directly addressed the audience and made for a more involving video. Unfortunately, I had to film this video alone as my partner was unavailable for filming. This caused me some issues as I had to set up the camera myself, whilst still attempting to keep within frame. This resulted in a lot of running backwards and forwards between my placement and the camera. Although this was tiring, it helped me to appreciate the large amount of effort that goes into the making of a music video. If I were to do this task again, I would record more takes of myself lip-syncing as I feel that it is not completely accurate at some points. Below I have included my audition video.
Prelim Task 2
Due to Taylor embodying several different genres within the music video, we had to learn varying types of dance styles. Our routines consisted of ballet, hip hop and contemporary moves, which each required a different skill set. Our dance teacher, Natasha, guided us during our rehearsals and ensured that we were constantly aware of what we were doing. We concentrated on exaggerating our precise physical movements and facial expressions in order to effectively our emotions to an audience, whether it was in real life, or on screen. This was also developed with the help of our drama coach, Jasmine, who helped us learn how to effectively embody the character of Taylor Swift. The varying dance routines made it harder to learn the movements as it could often get confusing, however, with many hours of rehearsals and the help of Natasha's online tutorials, we were able to learn all of the routines in such a short space of time. One thing that I did learn through this process was the need to actually sing the words of the song whilst performing in order to achieve the strains in your neck muscles so that the words looked as though they were actually being spoken.
Natasha's routine tutorial
Natasha's routine in the final edit
Prelim Task 3
In preparation for the shoot day, we had to decide on the costumes that we would wear for each set up. With the aid of our teachers and our costume designer, Olivia, we were able to find outfits that we felt stayed closest to the Taylor's costume in the actual music video and we were constantly adding to them in order to achieve this. For example, in the picture below I am holding a black bomber jacket however, in the final edit we decided to go with a red hoody instead. Although this was not the exact jacket that we wanted, it was the closest fit to the jacket that Taylor wears that we could find.
Original hip hop costume
My final hip hop costume
Above I have included photographs of myself with all of my costumes.
Prelim Task 5 This was the editing portion of the project and involved us creating our own sequences of the remake in groups. In my group I worked with Pheobe and Jerom. Editing a remake was a new experience for me and brought on some new challenges. For example, it was imperative that we matched the movement of lips to the lyrics of the song so that it appeared that the words were being spoken. This meant that we had to make very precise cuts during our edit. This was made easier by tools such as the razor tool as it allowed us to cut out the unnecessary parts of a take quicker. Originally, I was in charge of editing the street, contemporary and ribbon sections of the music video, however, eventually we decided as a group to simply edit whichever section we had the shots for. Personally, I found grading the most difficult part of this process as there had to be many different options to suit the different set up and lighting choices. Below I have included a picture showing some of my group's footage before and after grading.
Before
After
This helped me to learn the importance of grading as I was able to see an incredible improvement concerning the aesthetics of the footage afterwards. It helped to make all of the colours really pop and connoted energy and youth, which is vital in a pop video.


No comments:
Post a Comment